
阿里云 CentOS 7.6 安装 Oracle11gR2
环境:
操作系统:CentOS Linux release 7.6.1810 (Core)
Oracle版本:Oracle 11g R2 x86_64 ( Oracle 11.2.0.1.0 )
安全组配置开放端口:
1521、1158、5901
官方安装文档:https://docs.oracle.com/cd/E11882_01/install.112/e24326/toc.htm
安装桌面环境:
[root@iZj6cae5icqmf0twcxpyz5Z ~]# yum grouplist | more
[root@iZj6cae5icqmf0twcxpyz5Z ~]# yum groupinstall -y "GNOME Desktop"
[root@iZj6cae5icqmf0twcxpyz5Z ~]# systemctl set-default graphical.target       # 设置成图形模式
[root@iZj6cae5icqmf0twcxpyz5Z ~]# reboot
[root@iZj6cae5icqmf0twcxpyz5Z ~]# systemctl set-default multi-user.target //设置成命令模式
硬件检查
内存检查
物理内存:
至少1G,推荐2G以上
交换空间:
交换空间所需大小与物理内存关系对照如下:
| Available RAM | Swap Space Required |
| Between 1 GB and 2 GB | 1.5 times the size of the RAM |
| Between 2 GB and 16 GB | Equal to the size of the RAM |
| More than 16 GB | 16 GB |
阿里云服务器默认没有swap交换分区,需要自己创建,创建方式参考:https://www.chenxie.net/archives/501.html
[root@iZj6cae5icqmf0twcxpyz5Z ~]# free -m
              total        used        free      shared  buff/cache   available
Mem:           7821         746         123           7        6951        6739
Swap:          8191           0        8191
Automatic Memory Management
Starting with Oracle Database 11g, the Automatic Memory Management feature requires more shared memory (/dev/shm)and file descriptors. The shared memory should be sized to be at least the greater of MEMORY_MAX_TARGET and MEMORY_TARGET for each Oracle instance on that computer.
To determine the amount of shared memory available, enter the following command:
# df -h /dev/shm/
Note:
MEMORY_MAX_TARGET and MEMORY_TARGET cannot be used when LOCK_SGA is enabled or with HugePages on Linux.
磁盘检查
保证 /tmp 至少1G空间
[root@iZj6cae5icqmf0twcxpyz5Z ~]# df -h
Filesystem      Size  Used Avail Use% Mounted on
/dev/vda1        40G   13G   25G  34% /
devtmpfs        3.9G     0  3.9G   0% /dev
tmpfs           3.9G  4.0K  3.9G   1% /dev/shm
tmpfs           3.9G  1.4M  3.9G   1% /run
tmpfs           3.9G     0  3.9G   0% /sys/fs/cgroup
tmpfs           783M  4.0K  783M   1% /run/user/42
tmpfs           783M   52K  783M   1% /run/user/0
阿里云默认40G磁盘够了,没空间安装个屁的oracle。
软件检查
操作系统:
Red Hat Enterprise Linux 7
[root@iZj6cae5icqmf0twcxpyz5Z ~]# cat /etc/redhat-release
CentOS Linux release 7.6.1810 (Core)On Red Hat Enterprise Linux 7
3.10.0-54.0.1.el7.x86_64 or later
[root@iZj6cae5icqmf0twcxpyz5Z ~]# uname -r
3.10.0-957.21.3.el7.x86_64
软件包:
The following or later version of packages for Oracle Linux 7, and Red Hat Enterprise Linux 7 must be installed:
binutils-2.23.52.0.1-12.el7.x86_64
compat-libcap1-1.10-3.el7.x86_64
compat-libstdc++-33-3.2.3-71.el7.i686
compat-libstdc++-33-3.2.3-71.el7.x86_64
gcc-4.8.2-3.el7.x86_64
gcc-c++-4.8.2-3.el7.x86_64
glibc-2.17-36.el7.i686
glibc-2.17-36.el7.x86_64
glibc-devel-2.17-36.el7.i686
glibc-devel-2.17-36.el7.x86_64
ksh
libaio-0.3.109-9.el7.i686
libaio-0.3.109-9.el7.x86_64
libaio-devel-0.3.109-9.el7.i686
libaio-devel-0.3.109-9.el7.x86_64
libgcc-4.8.2-3.el7.i686
libgcc-4.8.2-3.el7.x86_64
libstdc++-4.8.2-3.el7.i686
libstdc++-4.8.2-3.el7.x86_64
libstdc++-devel-4.8.2-3.el7.i686
libstdc++-devel-4.8.2-3.el7.x86_64
libXi-1.7.2-1.el7.i686
libXi-1.7.2-1.el7.x86_64
libXtst-1.2.2-1.el7.i686
libXtst-1.2.2-1.el7.x86_64
make-3.82-19.el7.x86_64
sysstat-10.1.5-1.el7.x86_64
[root@iZj6cae5icqmf0twcxpyz5Z ~]# yum install -y binutils compat-libcap1 compat-libstdc++-33.i686 compat-libstdc++-33.x86_64 gcc gcc-c++ glibc.i686 glibc.x86_64 glibc-devel.i686 glibc-devel.x86_64 ksh libaio.i686 libaio.x86_64 libaio-devel.i686 libaio-devel.x86_64 libgcc.i686 libgcc.x86_64 libstdc++.i686 libstdc++.x86_64 libstdc++-devel.i686 libstdc++-devel.x86_64 libXi.i686 libXi.x86_64 libXtst.i686 libXtst.x86_64 make sysstat另外还需要的包:
[root@iZj6cae5icqmf0twcxpyz5Z ~]# yum install -y elfutils-libelf-devel
其他一些软件包需求:
Oracle ODBC Drivers
You should install ODBC Driver Manager for UNIX. You can download and install the Driver Manager from the following URL:
To use ODBC, you must also install the following additional ODBC RPMs, depending on your operating sytem:
On Oracle Linux 7, and Red Hat Enterprise Linux 7:
unixODBC-2.3.1-6.el7.x86_64 or laterunixODBC-2.3.1-6.el7.i686 or laterunixODBC-devel-2.3.1-6.el7.x86_64 or laterunixODBC-devel-2.3.1-6.el7.i686 or later
安装所需软件包:
[root@iZj6cae5icqmf0twcxpyz5Z ~]# yum install -y unixODBC.i686 unixODBC.x86_64 unixODBC-devel.i686 unixODBC-devel.x86_64开始安装
创建所需的用户和组:
[root@iZj6cae5icqmf0twcxpyz5Z ~]# groupadd oinstall
[root@iZj6cae5icqmf0twcxpyz5Z ~]# groupadd dba
[root@iZj6cae5icqmf0twcxpyz5Z ~]# useradd -g oinstall -G dba oracle
[root@iZj6cae5icqmf0twcxpyz5Z ~]# id oracle
uid=1000(oracle) gid=1000(oinstall) groups=1000(oinstall),1001(dba)
配置内核参数和资源限制:
Verify that the kernel parameters shown in the following table are set to values greater than or equal to the minimum value shown. The procedure following the table describes how to verify and set the values.
Note:
The kernel parameter and shell limit values in this section are minimum values only. For production database systems, Oracle recommends that you tune these values to optimize the performance of the system. Refer to your operating system documentation for more information about tuning kernel parameters.
| Parameter | Minimum Value | File |
|---|---|---|
semmsl
|
250
32000 100 128 |
/proc/sys/kernel/sem |
shmall |
2097152 | /proc/sys/kernel/shmall |
shmmax |
Minimum: 536870912
Maximum: A value that is 1 byte less than the physical memory Recommended: More than half the physical memory See My Oracle Support Note 567506.1 for additional information about configuring |
/proc/sys/kernel/shmmax |
shmmni |
4096 | /proc/sys/kernel/shmmni |
file-max |
6815744 | /proc/sys/fs/file-max |
ip_local_port_range |
Minimum: 9000
Maximum: 65500 |
/proc/sys/net/ipv4/ip_local_port_range |
rmem_default |
262144 | /proc/sys/net/core/rmem_default |
rmem_max |
4194304 | /proc/sys/net/core/rmem_max |
wmem_default |
262144 | /proc/sys/net/core/wmem_default |
wmem_max |
1048576 | /proc/sys/net/core/wmem_max |
aio-max-nr |
1048576
Note: This value limits concurrent outstanding requests and should be set to avoid I/O subsystem failures. |
/proc/sys/fs/aio-max-nr |
Note:
If the current value of any parameter is higher than the value listed in this table, then do not change the value of that parameter.
To view the current value specified for these kernel parameters, and to change them if necessary:
- Enter commands similar to the following to view the current values of the kernel parameters:
Note:
Make a note of the current values and identify any values that you must change.
Parameter Command semmsl,semmns,semopm, andsemmni# /sbin/sysctl -a | grep semThis command displays the value of the semaphore parameters in the order listed.
shmall,shmmax, andshmmni# /sbin/sysctl -a | grep shmfile-max# /sbin/sysctl -a | grep file-maxip_local_port_range# /sbin/sysctl -a | grep ip_local_port_rangermem_default# /sbin/sysctl -a | grep rmem_defaultrmem_max# /sbin/sysctl -a | grep rmem_maxwmem_default# /sbin/sysctl -a | grep wmem_defaultwmem_max# /sbin/sysctl -a | grep wmem_max
编辑文件 /etc/sysctl.conf 添加以下内容,如果里面的值已经大于添加的值则不要添加。
fs.aio-max-nr = 1048576
fs.file-max = 6815744
kernel.shmall = 2097152
kernel.shmmax = 536870912
kernel.shmmni = 4096
kernel.sem = 250 32000 100 128
net.ipv4.ip_local_port_range = 9000 65500
net.core.rmem_default = 262144
net.core.rmem_max = 4194304
net.core.wmem_default = 262144
net.core.wmem_max = 1048576
sysctl -p 即时生效。
Check Resource Limits for the Oracle Software Installation Users
On Oracle Linux systems, Oracle recommends that you install Oracle Preinstallation RPMs to meet preinstallation requirements like configuring your operating system to set the resource limits in the limits.conf file. Oracle Preinstallation RPM only configures the limits.conf file for the oracle user. If you are implementing Oracle Grid Infrastructure job role separation, then copy the values from the oracle user to the grid user in the limits.conf file.
For each installation software owner, check the resource limits for installation, using the following recommended ranges:
Table 1 Installation Owner Resource Limit Recommended Ranges
| Resource Shell Limit | Resource | Soft Limit | Hard Limit |
|---|---|---|---|
| Open file descriptors | nofile | at least 1024 | at least 65536 |
| Number of processes available to a single user | nproc | at least 2047 | at least 16384 |
| Size of the stack segment of the process | stack | at least 10240 KB | at least 10240 KB, and at most 32768 KB |
To check resource limits:
- Log in as an installation owner.
- Check the soft and hard limits for the file descriptor setting. Ensure that the result is in the recommended range. For example:
$ ulimit -Sn
4096
$ ulimit -Hn
65536
- Check the soft and hard limits for the number of processes available to a user. Ensure that the result is in the recommended range. For example:
$ ulimit -Su
2047
$ ulimit -Hu
16384
- Check the soft limit for the stack setting. Ensure that the result is in the recommended range. For example:
$ ulimit -Ss
10240
$ ulimit -Hs
32768
- Repeat this procedure for each Oracle software installation owner.
If necessary, update the resource limits in the /etc/security/limits.conf configuration file for the installation owner. However, note that the configuration file is distribution specific. Contact your system administrator for distribution specific configuration file information.
Note:
If the grid or oracle users are logged in, then changes in the limits.conf file do not take effect until you log these users out and log them back in. You must do this before you use these accounts for installation.
[root@iZj6cae5icqmf0twcxpyz5Z ~]# su - oracle
[oracle@iZj6cae5icqmf0twcxpyz5Z ~]$
[oracle@iZj6cae5icqmf0twcxpyz5Z ~]$ ulimit -Sn
65535
[oracle@iZj6cae5icqmf0twcxpyz5Z ~]$ ulimit -Hn
65535
[oracle@iZj6cae5icqmf0twcxpyz5Z ~]$ ulimit -Su
4096
[oracle@iZj6cae5icqmf0twcxpyz5Z ~]$ ulimit -Hu
31164
[oracle@iZj6cae5icqmf0twcxpyz5Z ~]$ ulimit -Ss
8192
[oracle@iZj6cae5icqmf0twcxpyz5Z ~]$ ulimit -Hs
unlimited
添加以下到 /etc/security/limits.conf
oracle soft nofile 65536
oracle hard nofile 65536
创建oracle所需目录:
[root@iZ2ze1uokpww52hrtbj6loZ ~]# mkdir -p /data/app/oracle
[root@iZj6cae5icqmf0twcxpyz5Z ~]# mkdir -p /data/app/oracle/oraInventory
[root@iZ2ze1uokpww52hrtbj6loZ ~]# chown -R oracle.oinstall /data/app/oracle/
[root@iZ2ze1uokpww52hrtbj6loZ ~]# chmod -R 755 /data/app/oracle/
配置oracle用户环境变量:
[root@iZ2ze1uokpww52hrtbj6loZ ~]# su - oracle
[oracle@iZ2ze1uokpww52hrtbj6loZ ~]$ vim .bash_profile
添加以下,保存退出:
ORACLE_BASE=/data/app/oracle
ORACLE_HOME=/data/app/oracle/product/11.2.0/dbhome_1
ORACLE_SID=chenxie
PATH=$PATH:$ORACLE_HOME/bin
export ORACLE_BASE ORACLE_HOME ORACLE_SID PATH
开始安装:
[root@iZj6cae5icqmf0twcxpyz5Z ~]# mkdir /data/software
[root@iZj6cae5icqmf0twcxpyz5Z ~]# cd /data/software/
[root@iZj6cae5icqmf0twcxpyz5Z software]# wget https://software.qooco.com/Oracle/oracle11gR2_for_linux_x64/11.2.0.1.0/linux.x64_11gR2_database_1of2.zip
[root@iZj6cae5icqmf0twcxpyz5Z software]# wget https://software.qooco.com/Oracle/oracle11gR2_for_linux_x64/11.2.0.1.0/linux.x64_11gR2_database_2of2.zip
[root@iZj6cae5icqmf0twcxpyz5Z software]# unzip linux.x64_11gR2_database_1of2.zip
[root@iZj6cae5icqmf0twcxpyz5Z software]# unzip linux.x64_11gR2_database_2of2.zip
ok,安装前工作完成,最好重启一下机器,保证所设置参数都生效。
# reboot
接下来在桌面环境下操作:
安装vnc:(你也可以进入阿里云控制台,找到你的这台机器,点击“远程连接”进入桌面,但是很卡顿)
[root@iZ2ze1uokpww52hrtbj6loZ ~]# yum install -y tigervnc-server
[root@iZ2ze1uokpww52hrtbj6loZ ~]# vncpasswd
[root@iZ2ze1uokpww52hrtbj6loZ ~]# vncserver :1

New 'iZ2ze1uokpww52hrtbj6loZ:1 (root)' desktop is iZ2ze1uokpww52hrtbj6loZ:1

Starting applications specified in /root/.vnc/xstartup
Log file is /root/.vnc/iZ2ze1uokpww52hrtbj6loZ:1.log
启动后使用 VNC viewer进行连接。
连接成功后打开终端,执行以下开始安装:
[root@iZj6cae5icqmf0twcxpyz5Z ~]# echo $DISPLAY
:1
[root@iZj6cae5icqmf0twcxpyz5Z ~]# xhost +
access control disabled, clients can connect from any host
[root@iZj6cae5icqmf0twcxpyz5Z ~]# su - oracle
Last login: Thu Aug 15 12:48:41 CST 2019 on pts/1
[oracle@iZj6cae5icqmf0twcxpyz5Z ~]$ export DISPLAY=:1
[oracle@iZj6cae5icqmf0twcxpyz5Z ~]$ echo $DISPLAY
:1
[oracle@iZj6cae5icqmf0twcxpyz5Z ~]$ cd /data/software/database/
[oracle@iZj6cae5icqmf0twcxpyz5Z database]$ ./runInstaller -jreLoc /etc/alternatives/jre_1.8.0     # 运行这个替换 ./runInstaller  避免弹框不全的问题
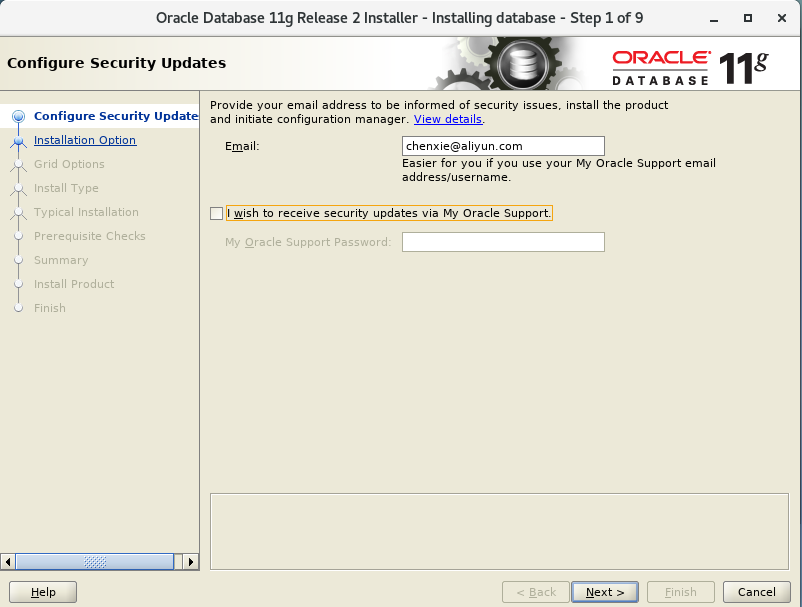
进入安装界面:
1. 输入你的邮箱用于接收安全问题
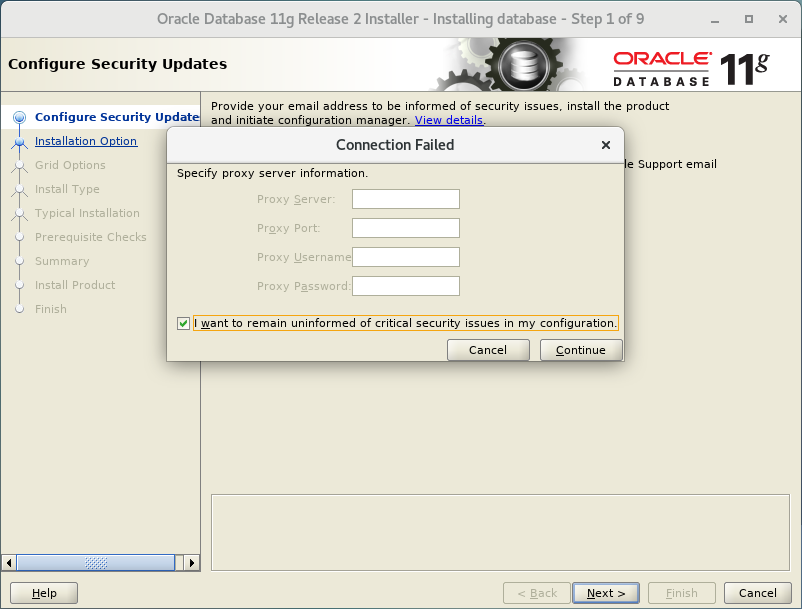
2. 勾选复选框,继续
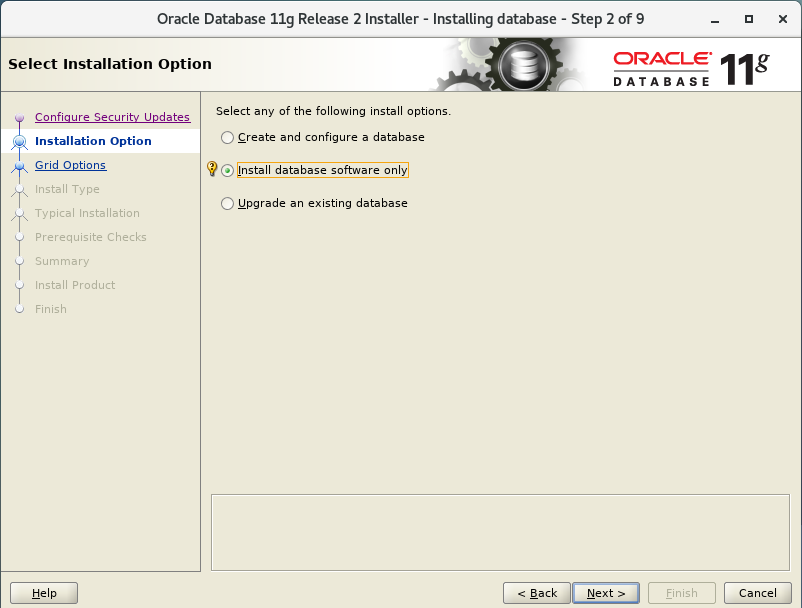
3. 这里我们选择 只安装数据库软件,等会儿再创建数据库
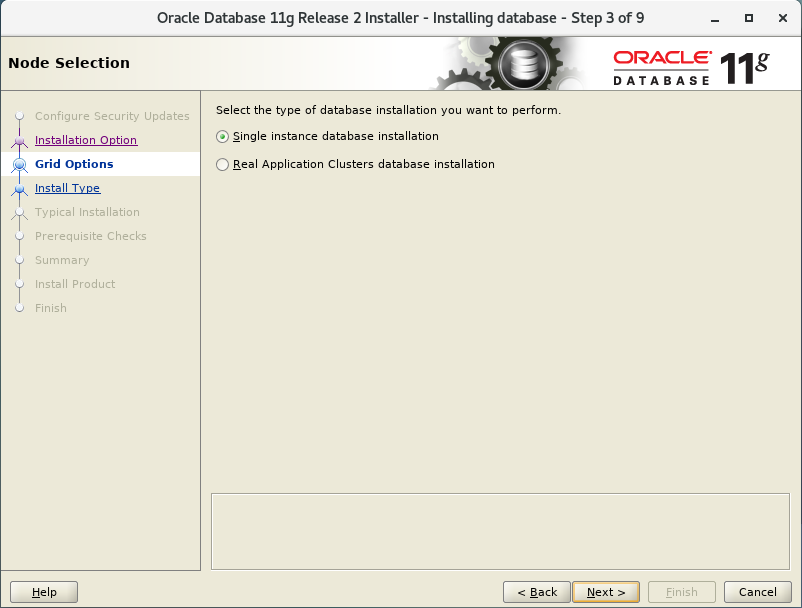
4. 选择单机安装
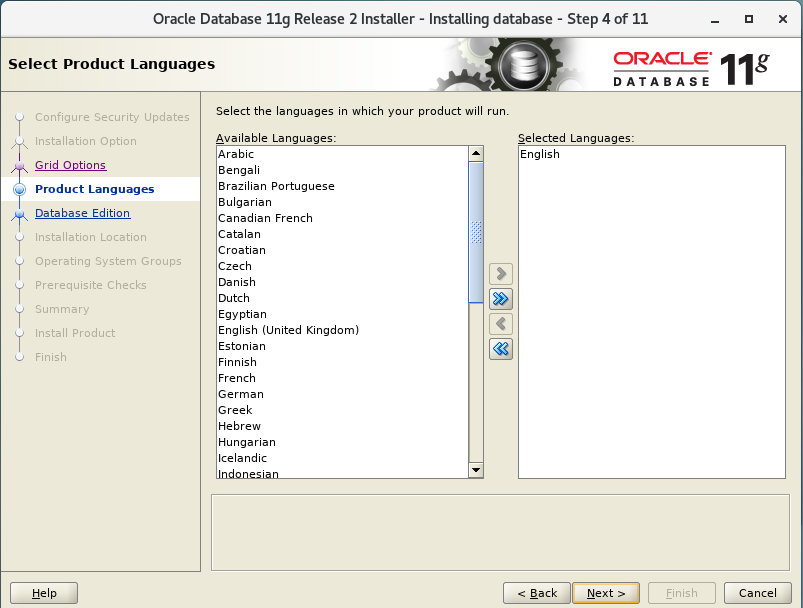
5. 选择默认的English,这里面也没有中文供你选择
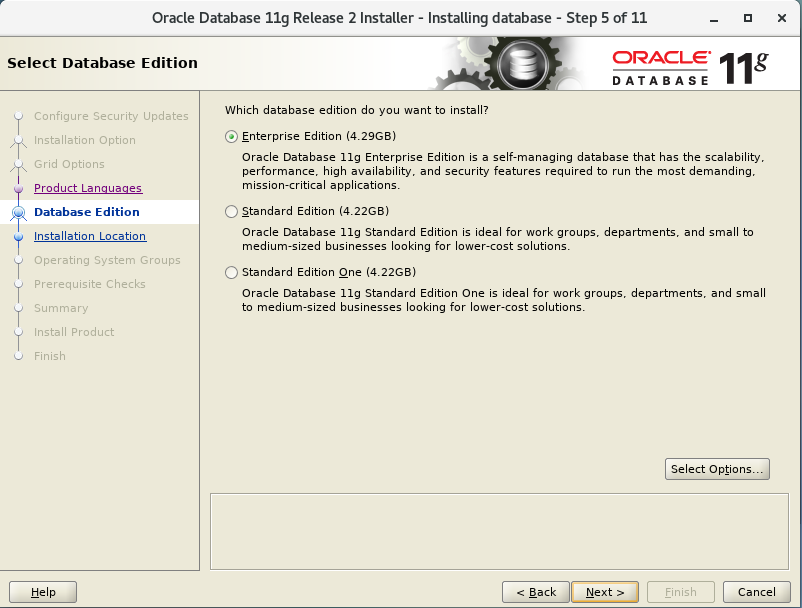
6. 选择安装 企业版
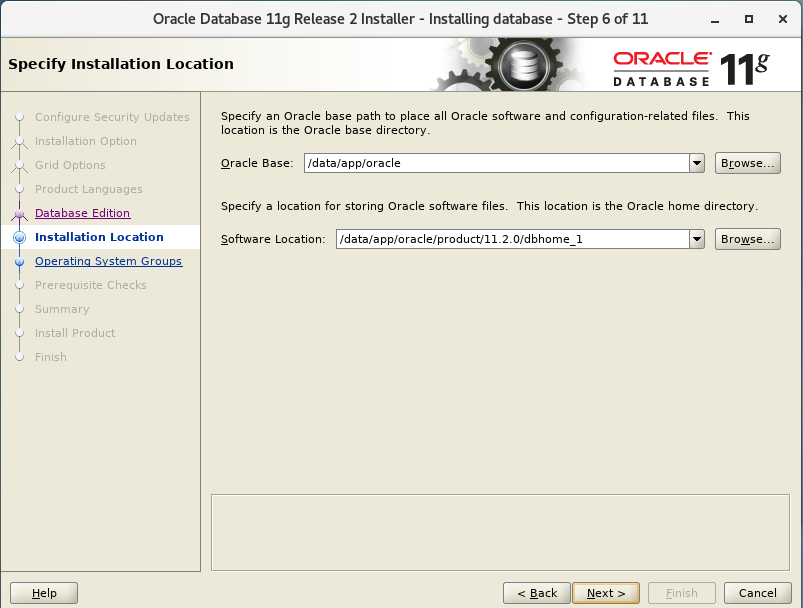
7. 相应目录已根据设置的环境变量自动填充
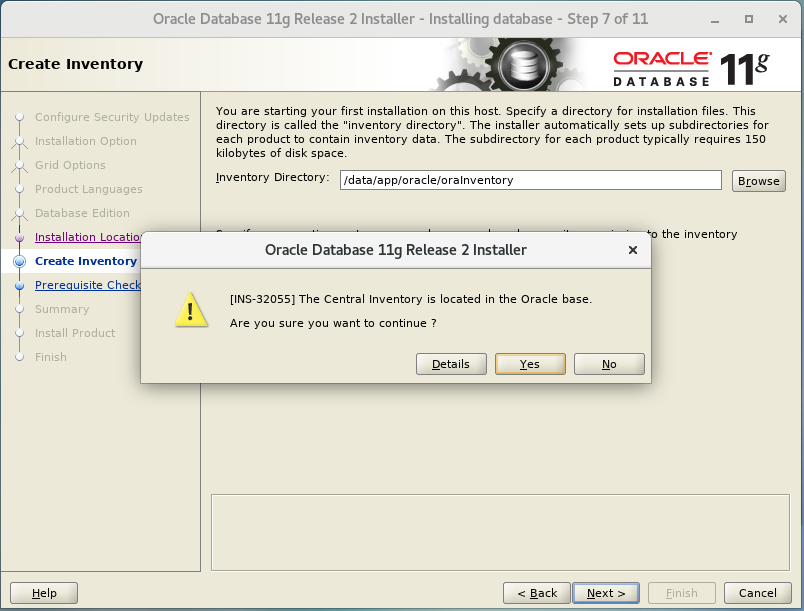
8. 这里要修改为你创建的 oraInventory 目录,我的是 /data/app/oracle/oraInventory
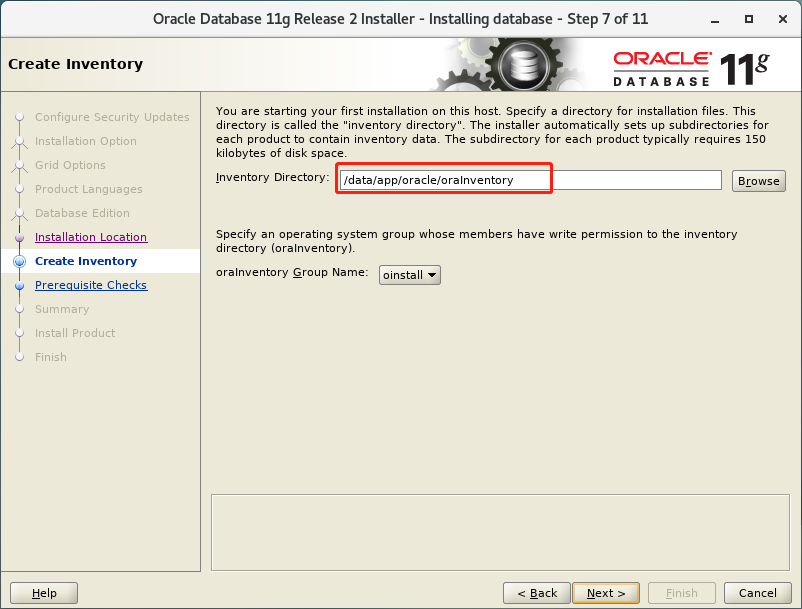
9. 它建议将oraInventory目录放在oracle目录外,不管我就要放,选择 yes
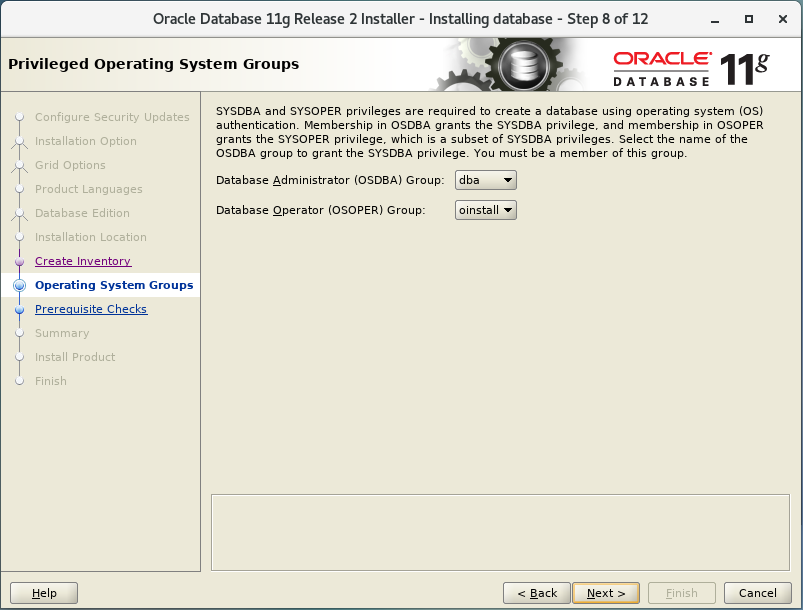
10. 保持默认,不用管
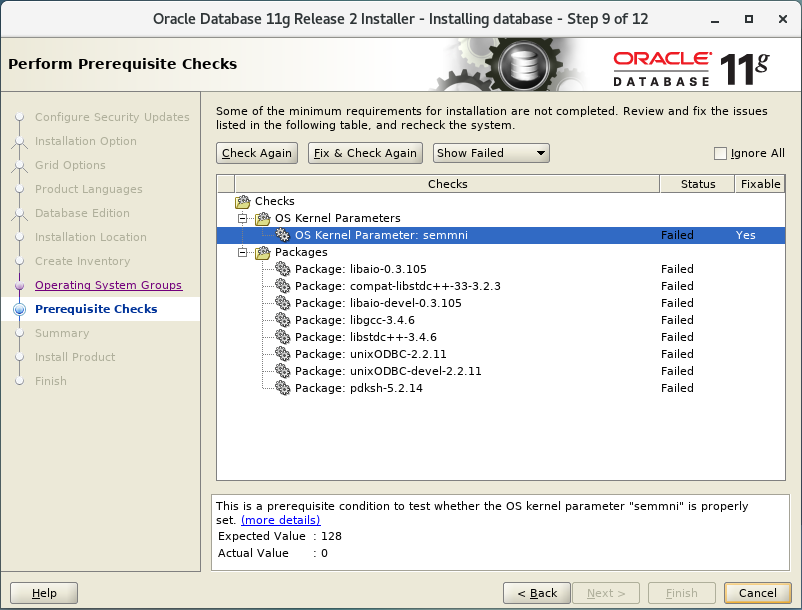
11. 环境检查,这里检查出了一个内核问题和一些包的问题
内核问题:通过 grep sem /etc/sysctl.conf 可以看到我的值就是128,但是它没有识别出来所以不管它,继续往下
依赖包问题:它要的那些包都是32位的,我的机器上已经有64位的包了,所以就不管了,最后一个pdksh-5.2.14没有显示需要的位数,但是本机上依然是有64位的ksh的,所以不管,继续
如果遇到 max user processes 问题,参考进行解决:https://www.58jb.com/html/173.html
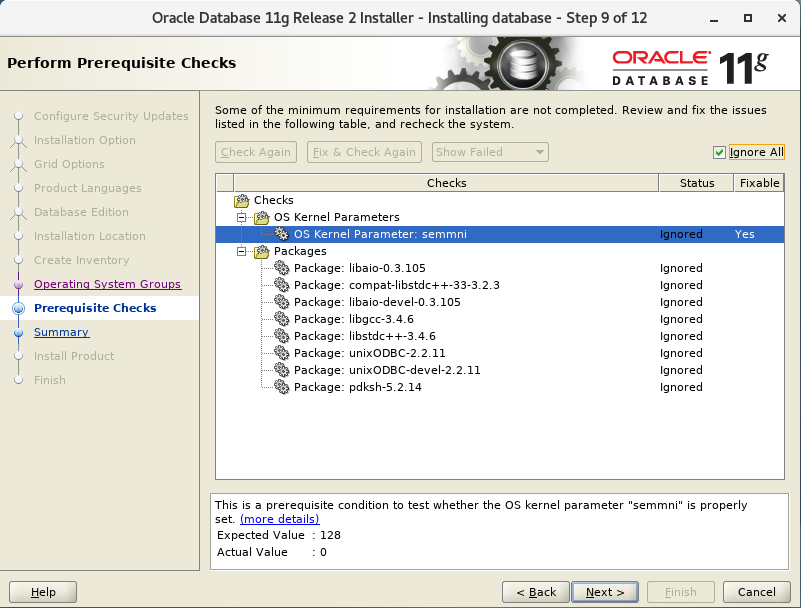
选择右上方的 Ignore All ,继续下一步
12. 选择右上方的 Ignore All ,继续下一步
13. 点击 Finish 开始安装
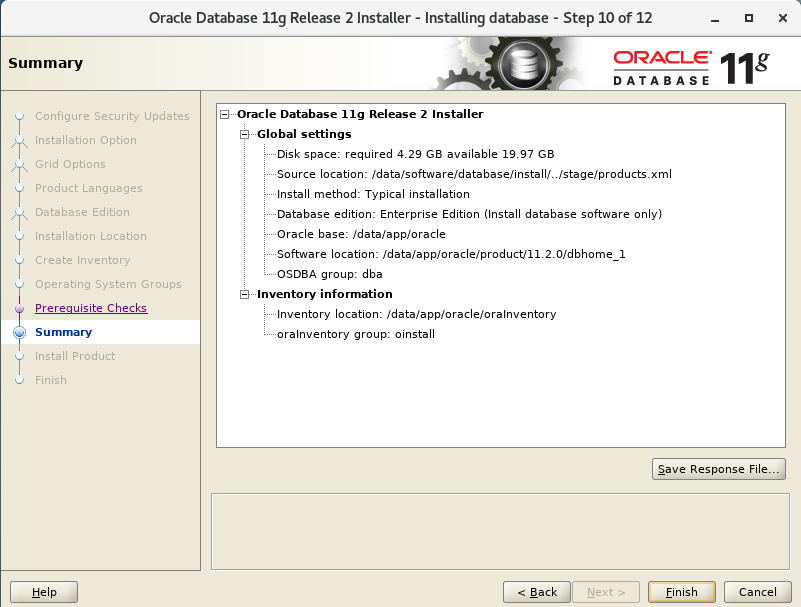
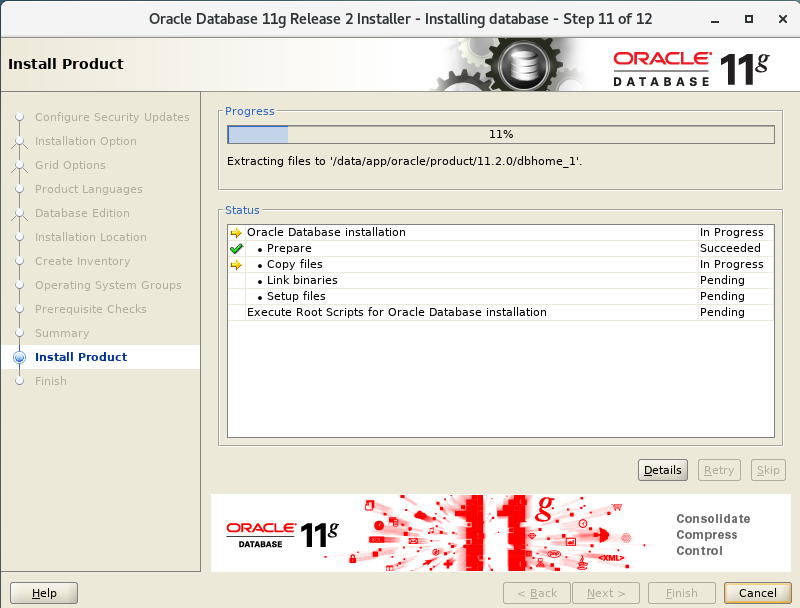
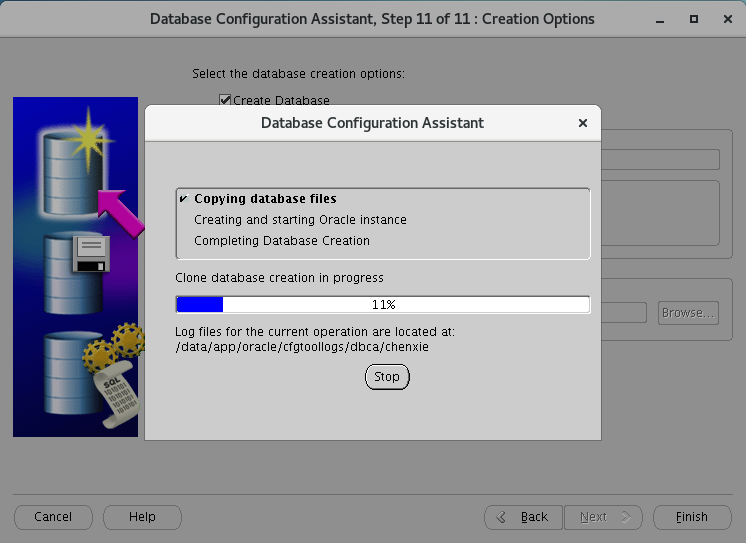
14. 开始安装进度...
15. 得到第一个错误。
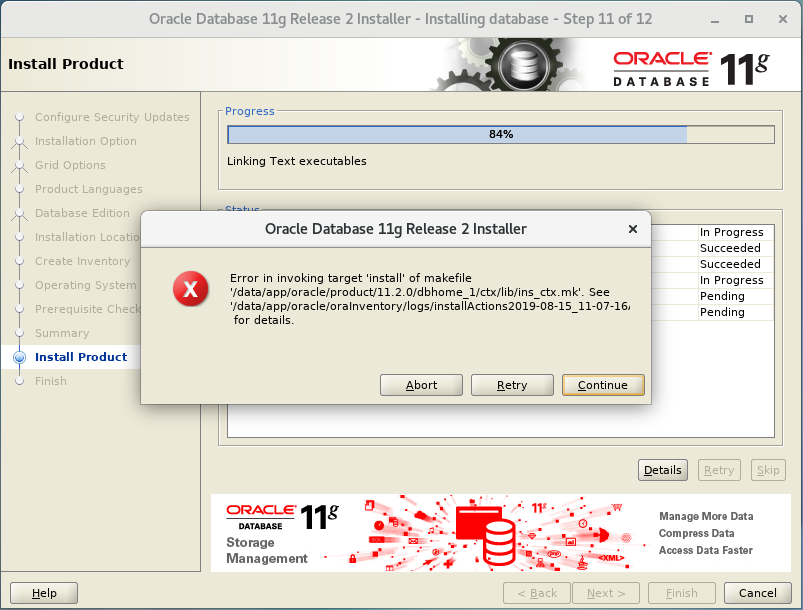
解决办法:https://www.uxora.com/oracle/dba/23-oracle-installation-errors-and-fixes
执行以下脚本:
# Fix ctx/lib/ins_ctx.mk

ORACLE_HOME=/data/app/oracle/product/11.2.0/dbhome_1

cat << __EOF__ > /tmp/memcpy_wrap.c
#include <stddef.h>
#include <string.h>

asm (".symver wrap_memcpy, memcpy@GLIBC_2.14");
void *wrap_memcpy(void *dest, const void *src, size_t n) {
return memcpy(dest, src, n);
}
__EOF__

if [[ -e "${ORACLE_HOME}/ctx/lib/ins_ctx.mk" ]]; then
sed -i -e 's/\$(INSO_LINK)/\$(INSO_LINK) -Wl,--wrap=memcpy_wrap \$(ORACLE_HOME)\/ctx\/lib\/memcpy_wrap.o/g' ${ORACLE_HOME}/ctx/lib/ins_ctx.mk
gcc -c /tmp/memcpy_wrap.c -o ${ORACLE_HOME}/ctx/lib/memcpy_wrap.o && rm /tmp/memcpy_wrap.c
fi
16. 得到第二个错误
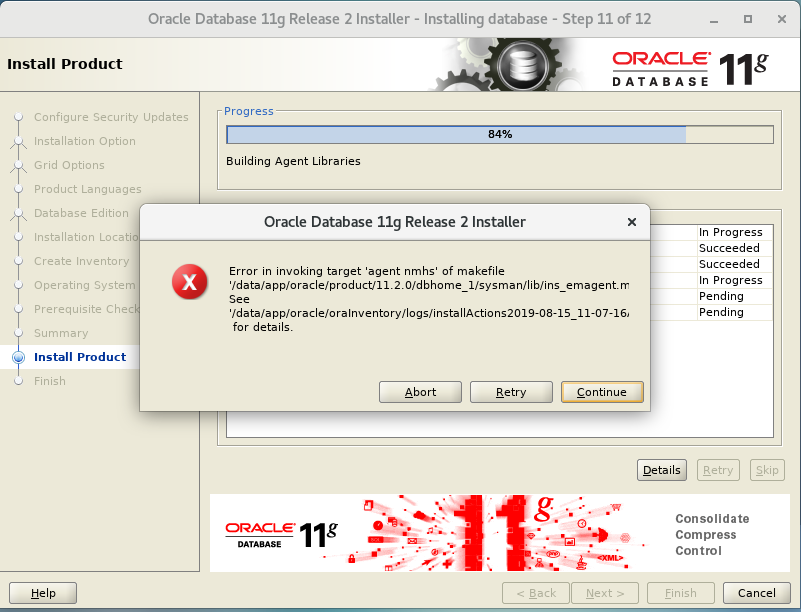
解决办法:https://www.uxora.com/oracle/dba/23-oracle-installation-errors-and-fixes
执行以下脚本:
# Fix ctx/lib/ins_ctx.mk

ORACLE_HOME=/data/app/oracle/product/11.2.0/dbhome_1

if [[ -e "${ORACLE_HOME}/sysman/lib/ins_emagent.mk" ]]; then
sed -i -e 's/\$(MK_EMAGENT_NMECTL)/\$(MK_EMAGENT_NMECTL) -lnnz11/g' ${ORACLE_HOME}/sysman/lib/ins_emagent.mk
fi
17. 执行提示的2个脚本
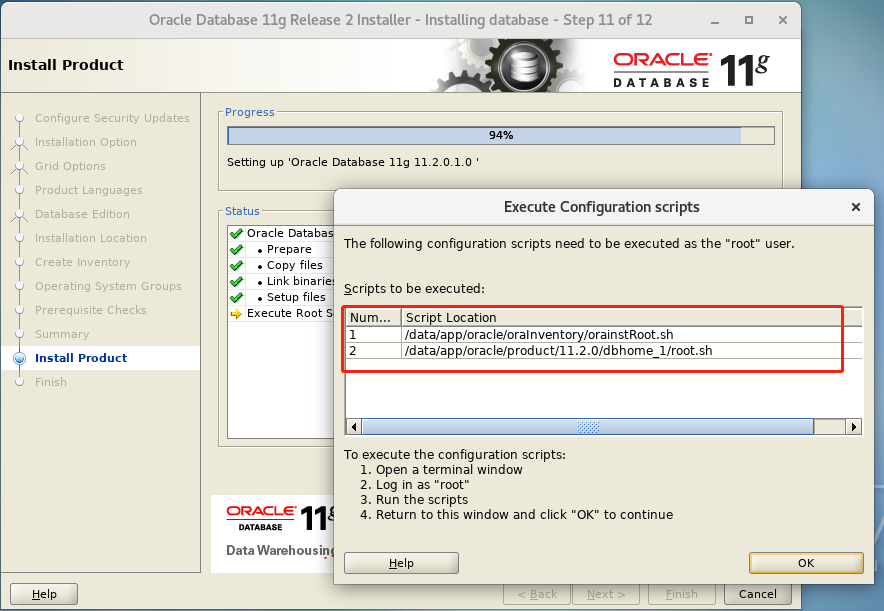
[root@iZj6cae5icqmf0twcxpyz5Z ~]# /data/app/oracle/oraInventory/orainstRoot.sh
Changing permissions of /data/app/oracle/oraInventory.
Adding read,write permissions for group.
Removing read,write,execute permissions for world.
Changing groupname of /data/app/oracle/oraInventory to oinstall.
The execution of the script is complete.
[root@iZj6cae5icqmf0twcxpyz5Z ~]# /data/app/oracle/product/11.2.0/dbhome_1/root.sh
Running Oracle 11g root.sh script...
The following environment variables are set as:
ORACLE_OWNER= oracle
ORACLE_HOME= /data/app/oracle/product/11.2.0/dbhome_1
Enter the full pathname of the local bin directory: [/usr/local/bin]:
Copying dbhome to /usr/local/bin ...
Copying oraenv to /usr/local/bin ...
Copying coraenv to /usr/local/bin ...
Creating /etc/oratab file...
Entries will be added to the /etc/oratab file as needed by
Database Configuration Assistant when a database is created
Finished running generic part of root.sh script.
Now product-specific root actions will be performed.
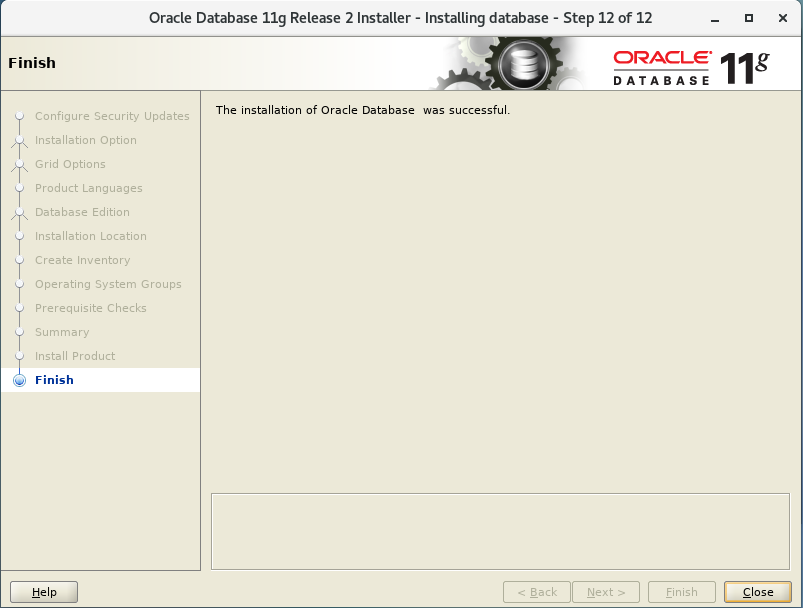
Finished product-specific root actions.18. 安装完成
接下来创建数据库:
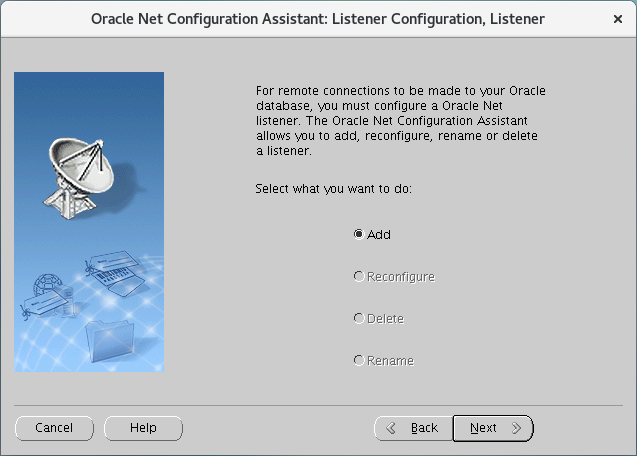
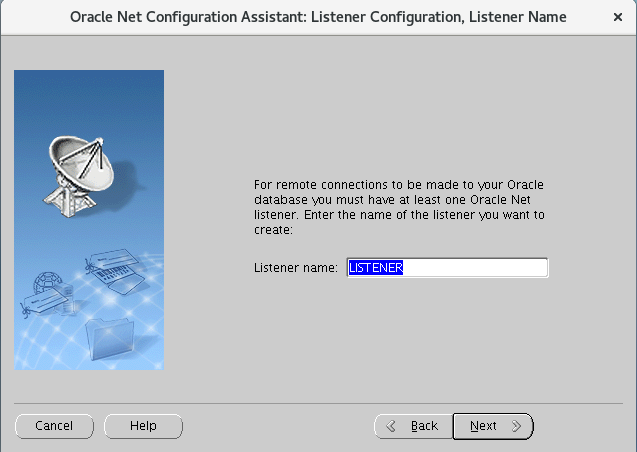
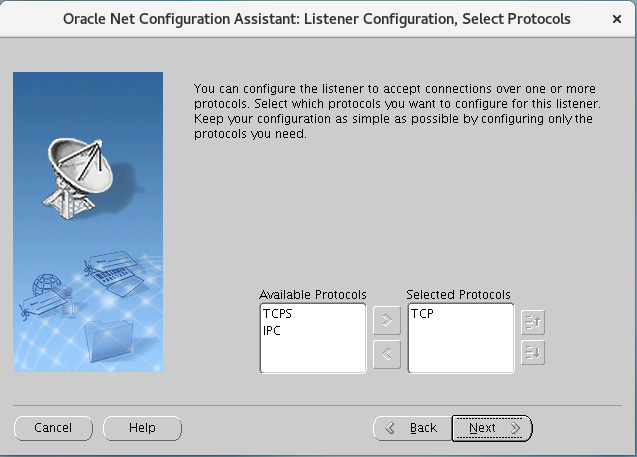
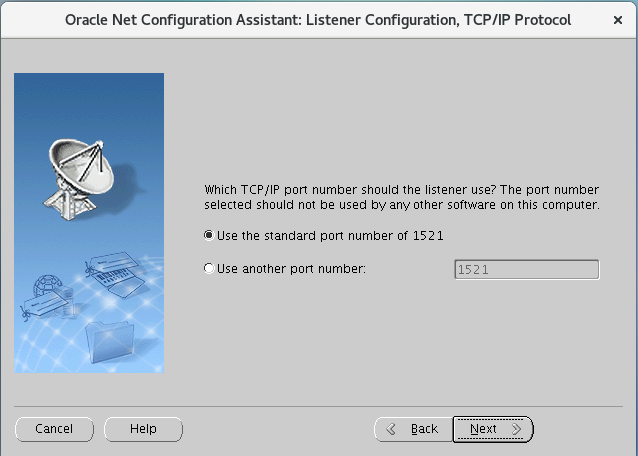
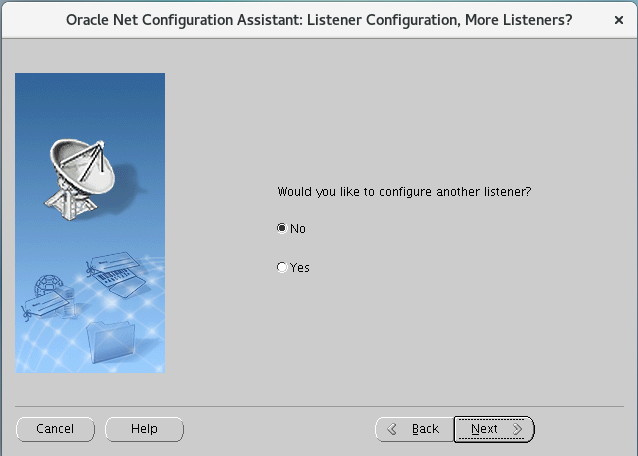
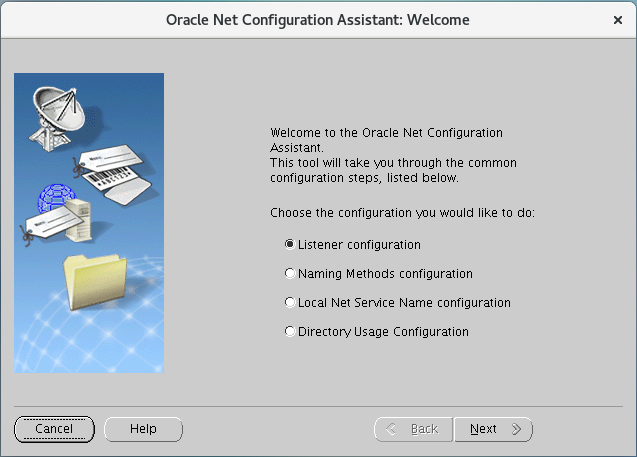
首先添加监听:
[oracle@iZj6cae5icqmf0twcxpyz5Z database]$ cd /data/app/oracle/product/11.2.0/dbhome_1/bin/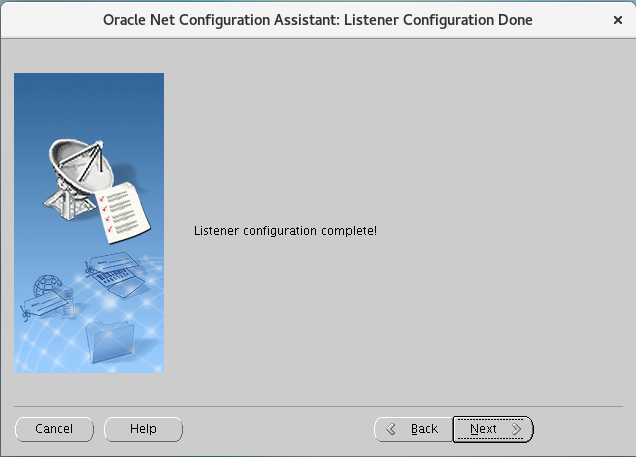
[oracle@iZj6cae5icqmf0twcxpyz5Z bin]$ ./netca 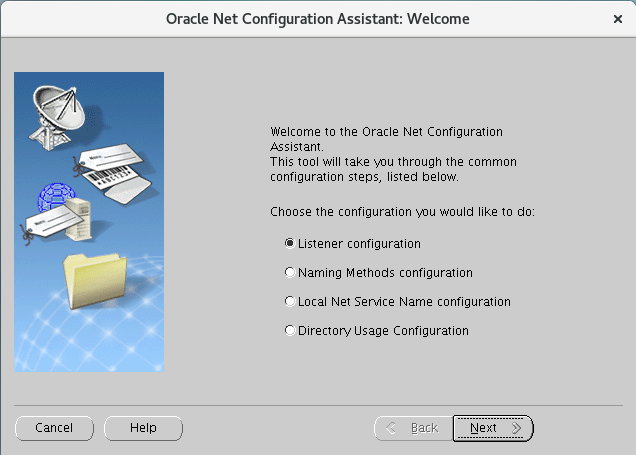
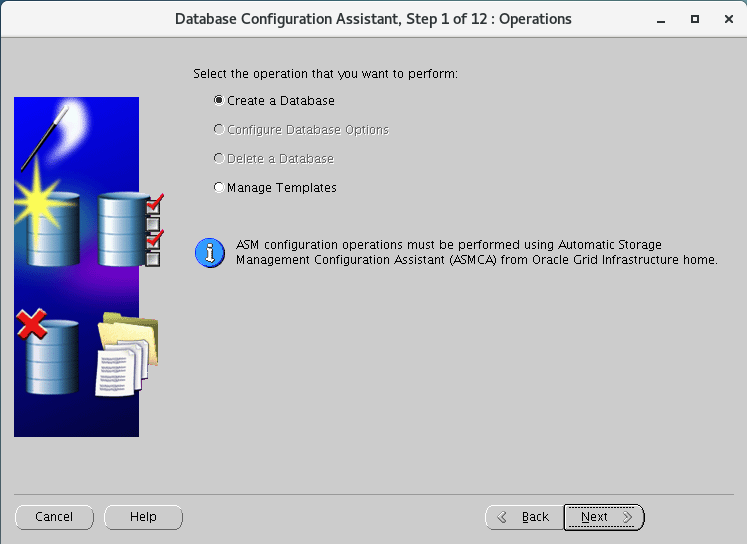
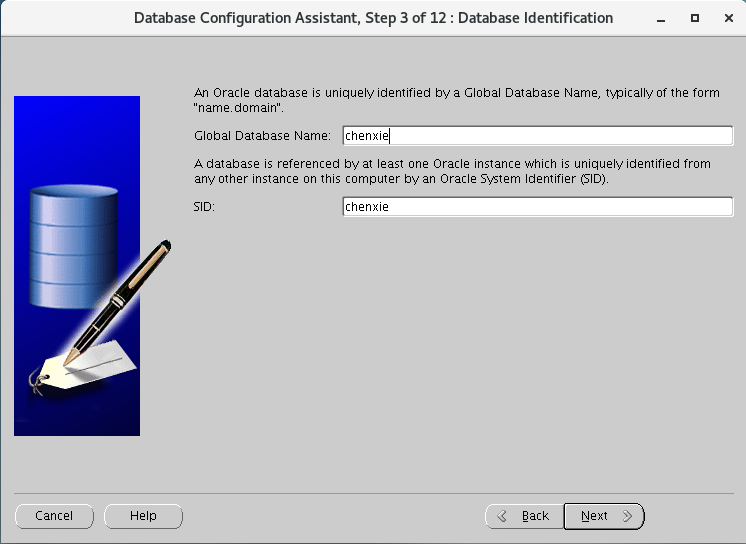
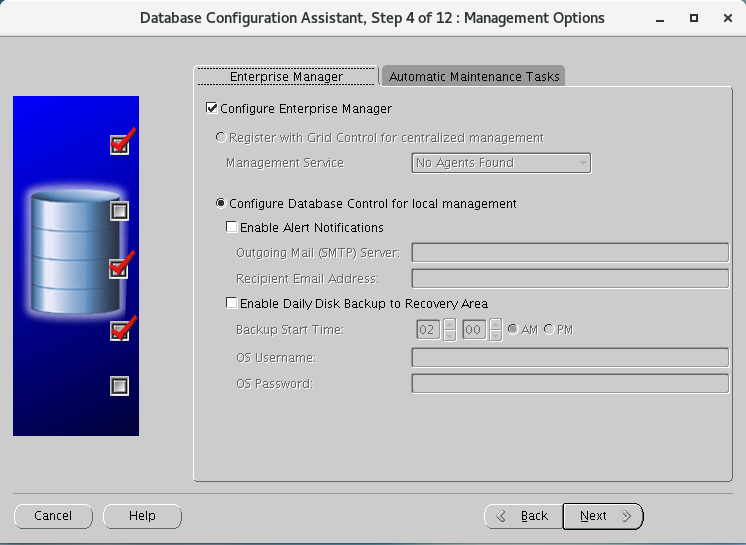
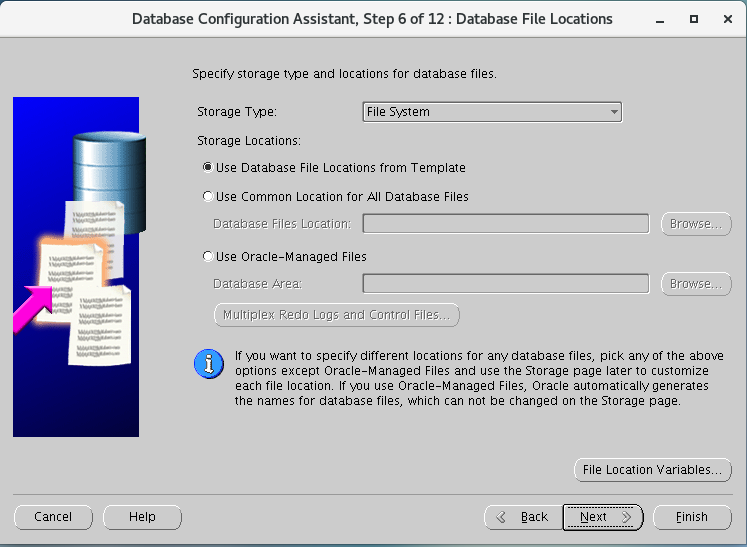
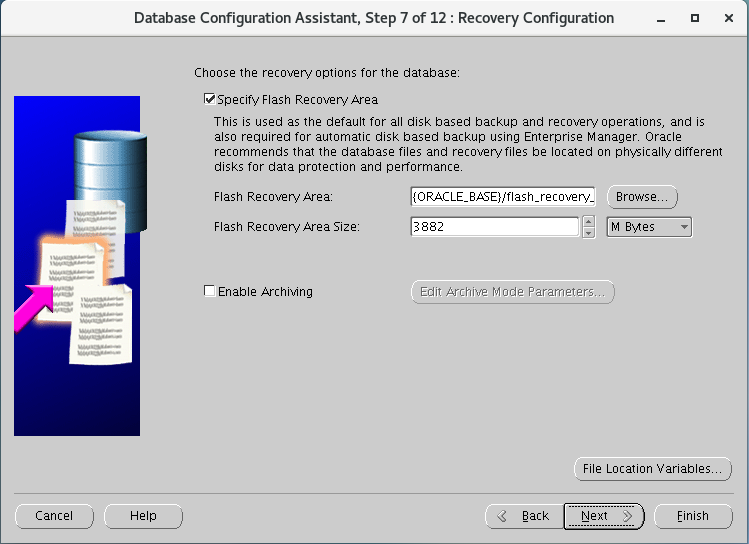
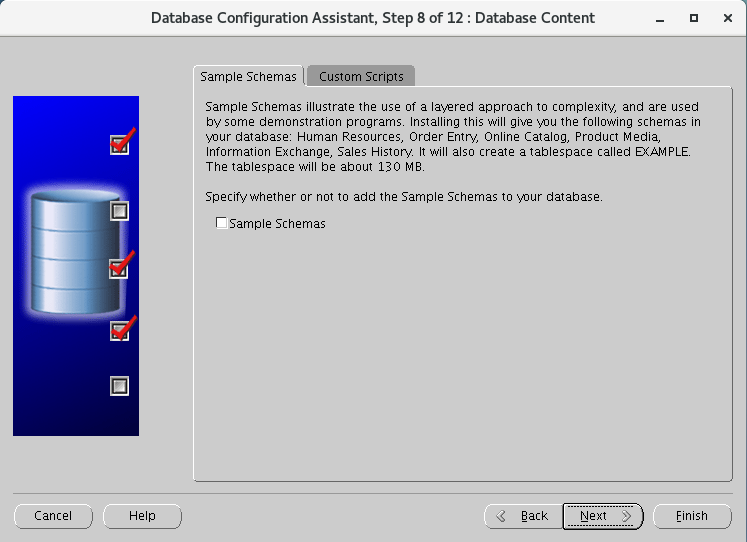
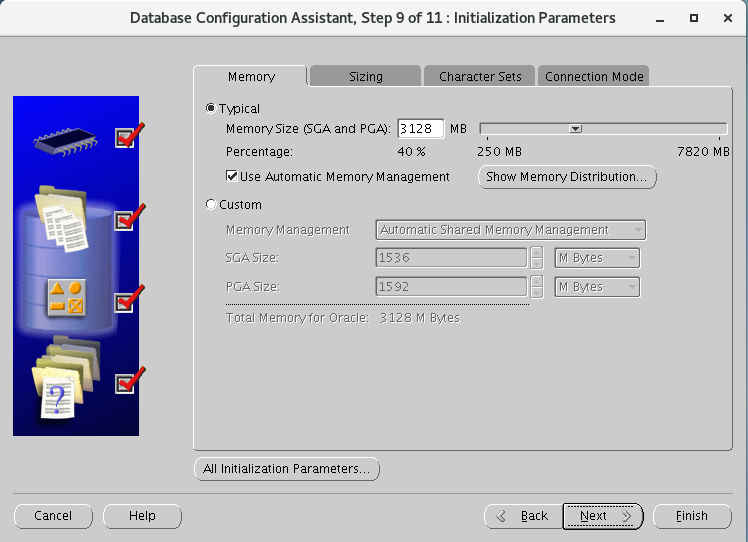
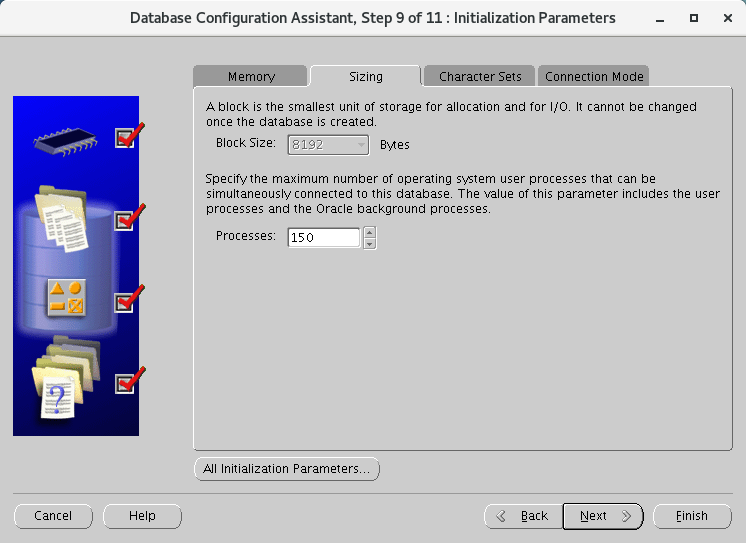
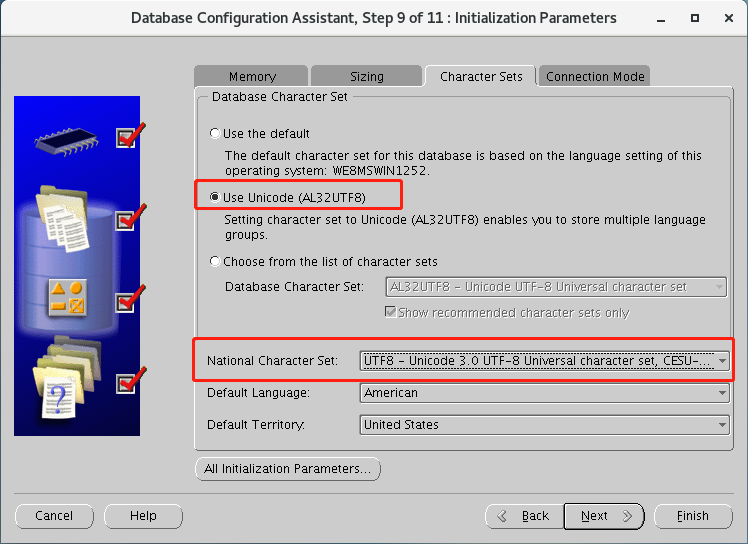
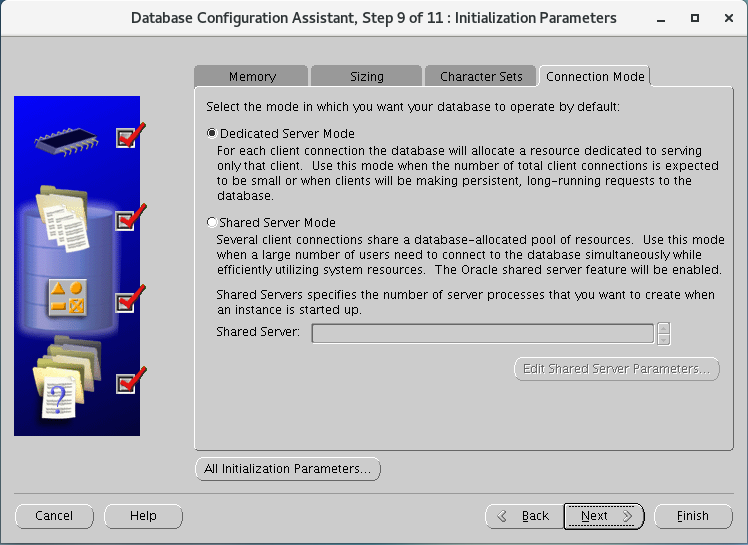
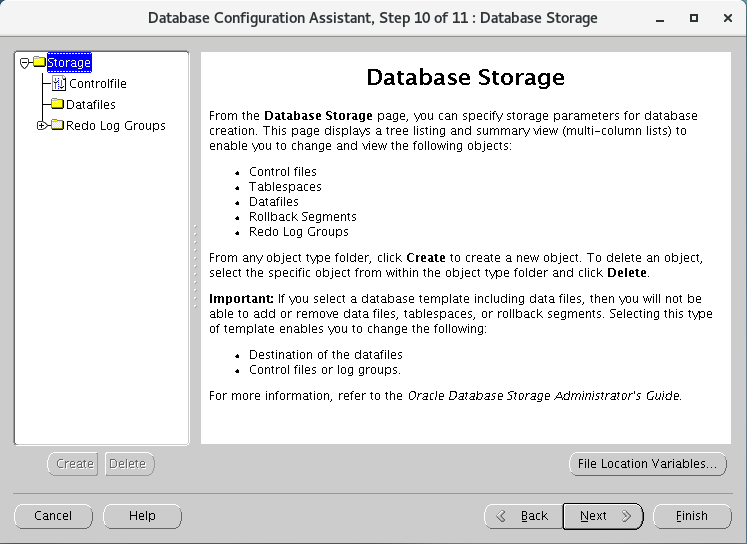
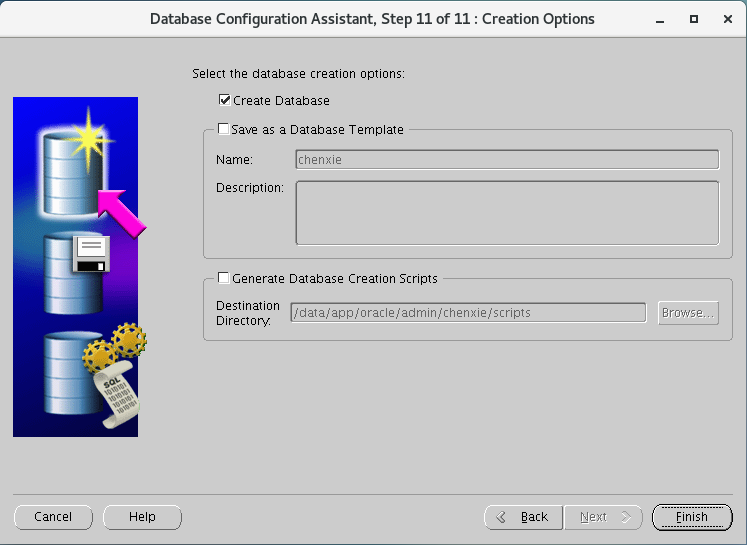
接下来创建数据库:
[oracle@iZj6cae5icqmf0twcxpyz5Z database]$ cd /data/app/oracle/product/11.2.0/dbhome_1/bin/
[oracle@iZj6cae5icqmf0twcxpyz5Z bin]$ ./dbca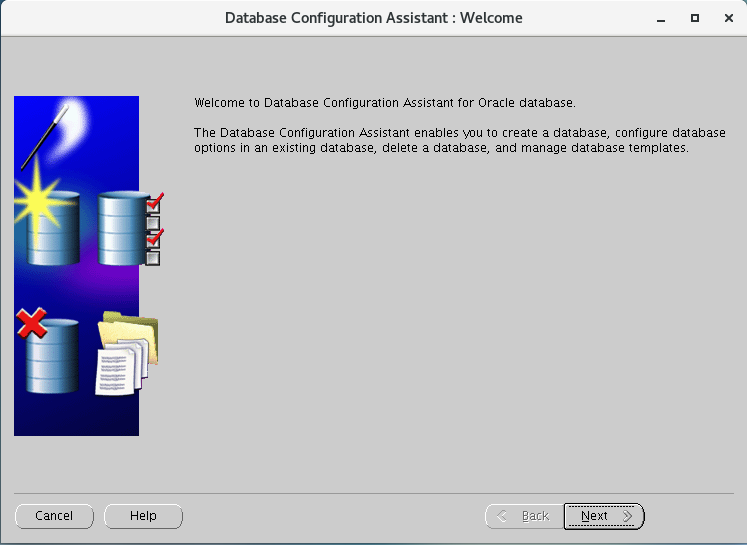


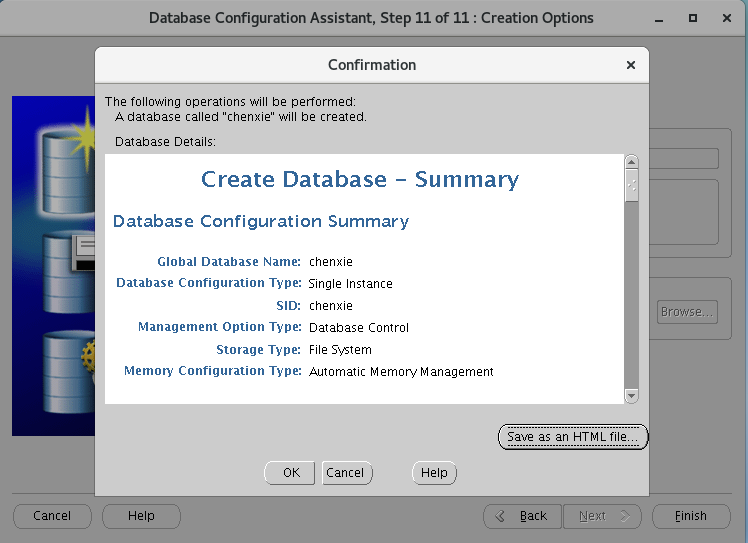
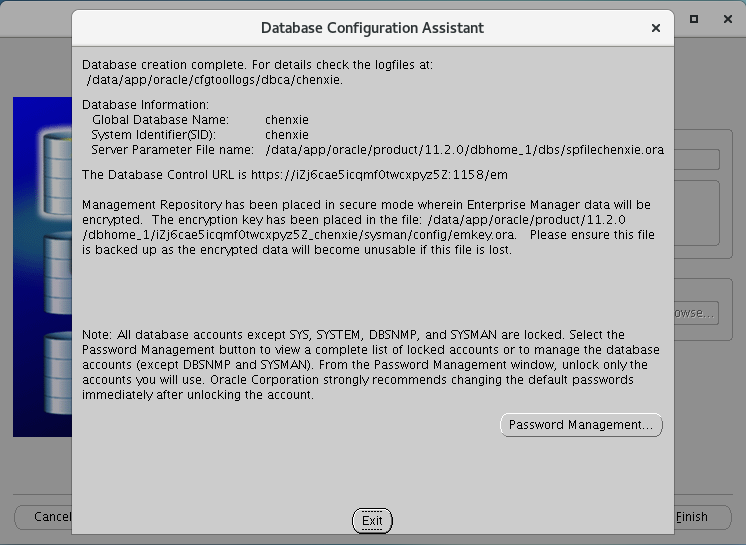
安装完成,点击Exit退出。
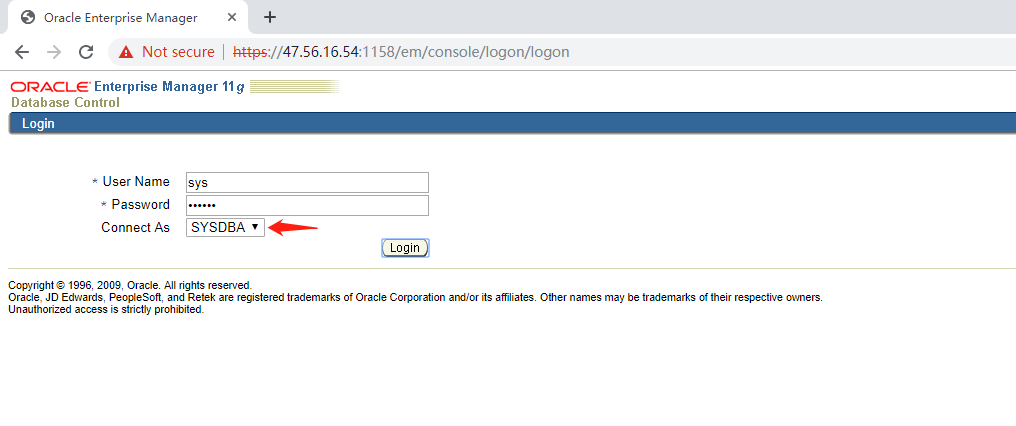
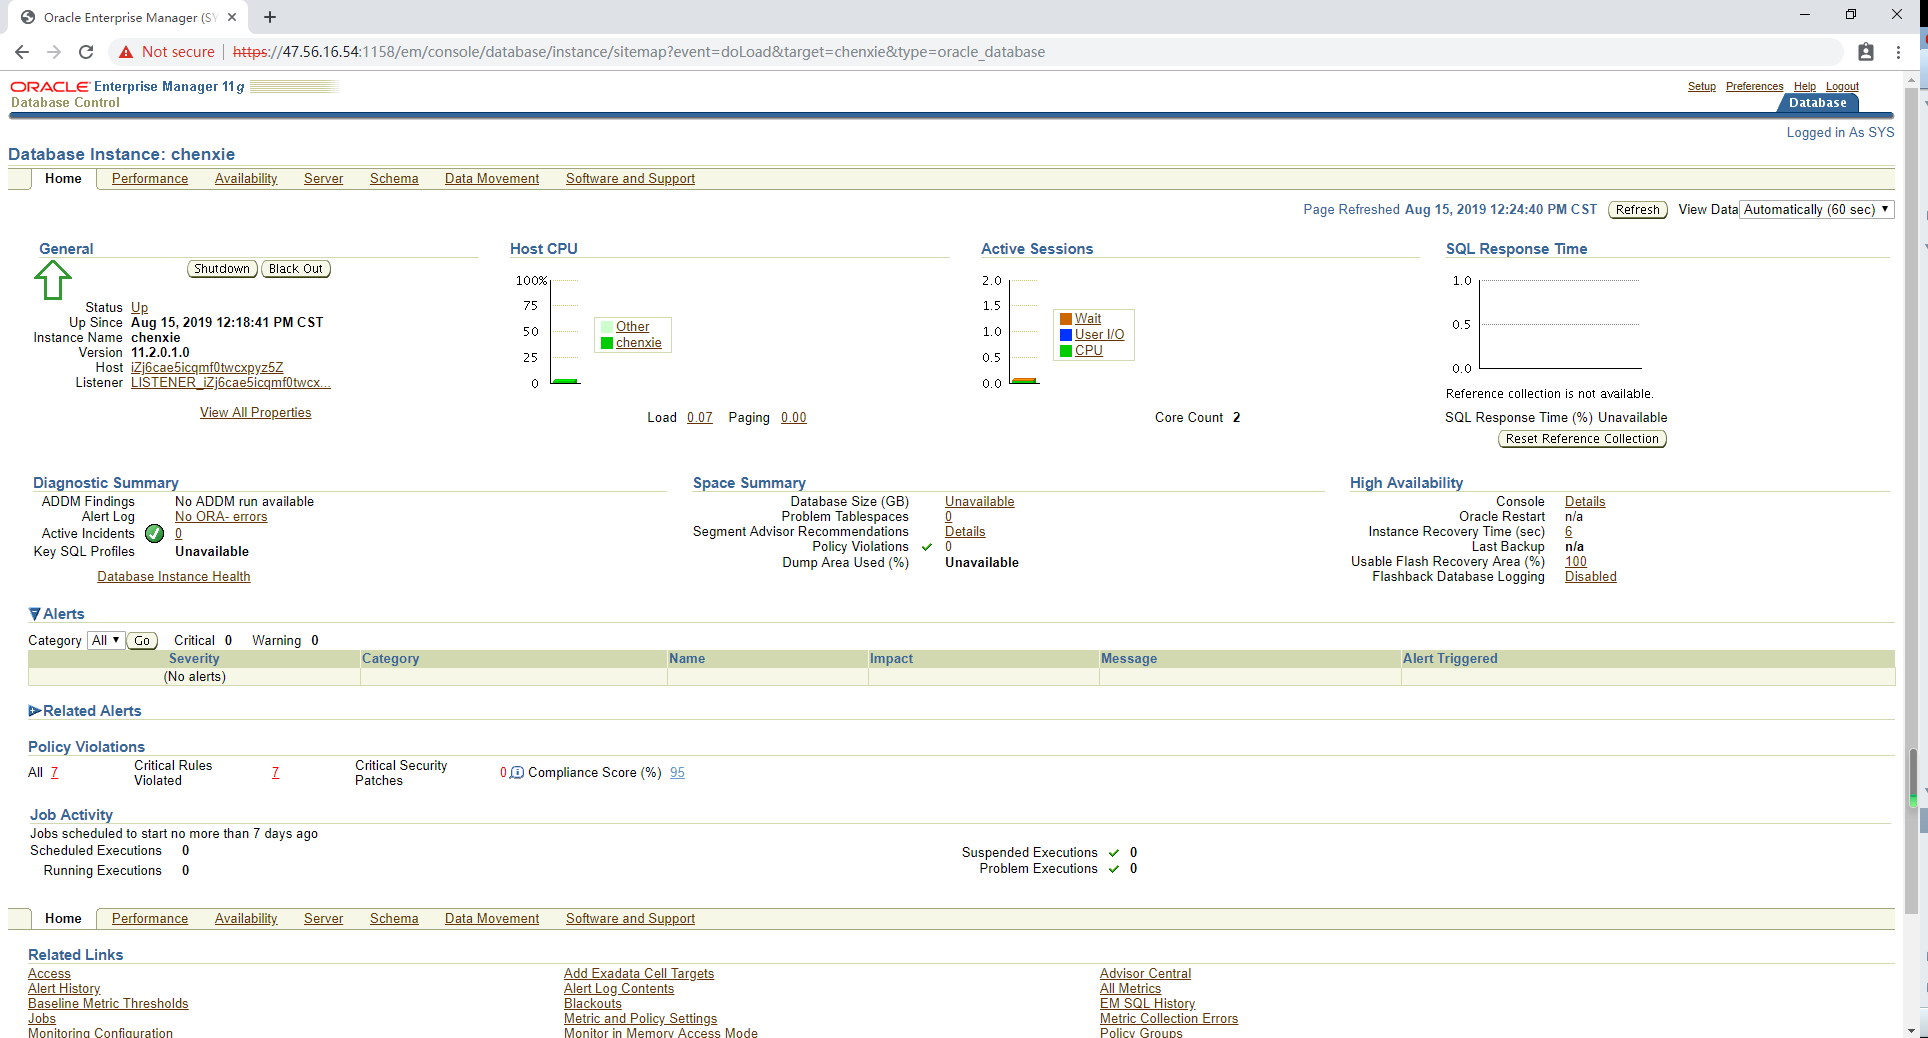
在浏览器中登录em:https://47.56.16.54:1158/em 查看服务信息
如下图:
使用Oracle SQL Develop工具进行连接测试:
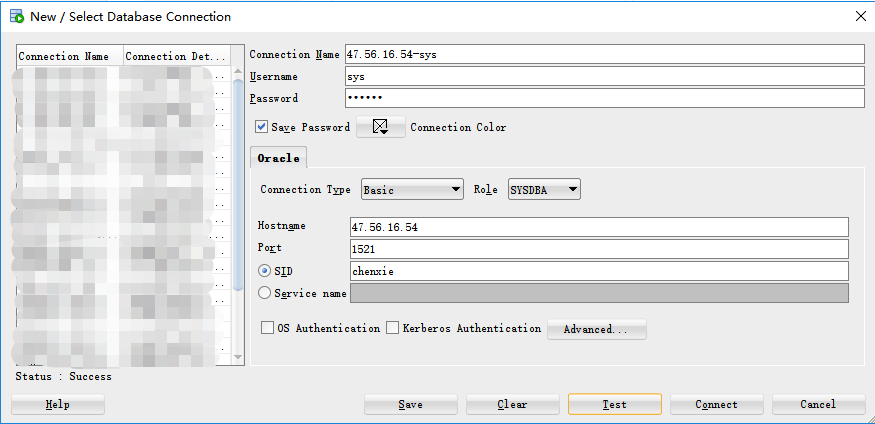
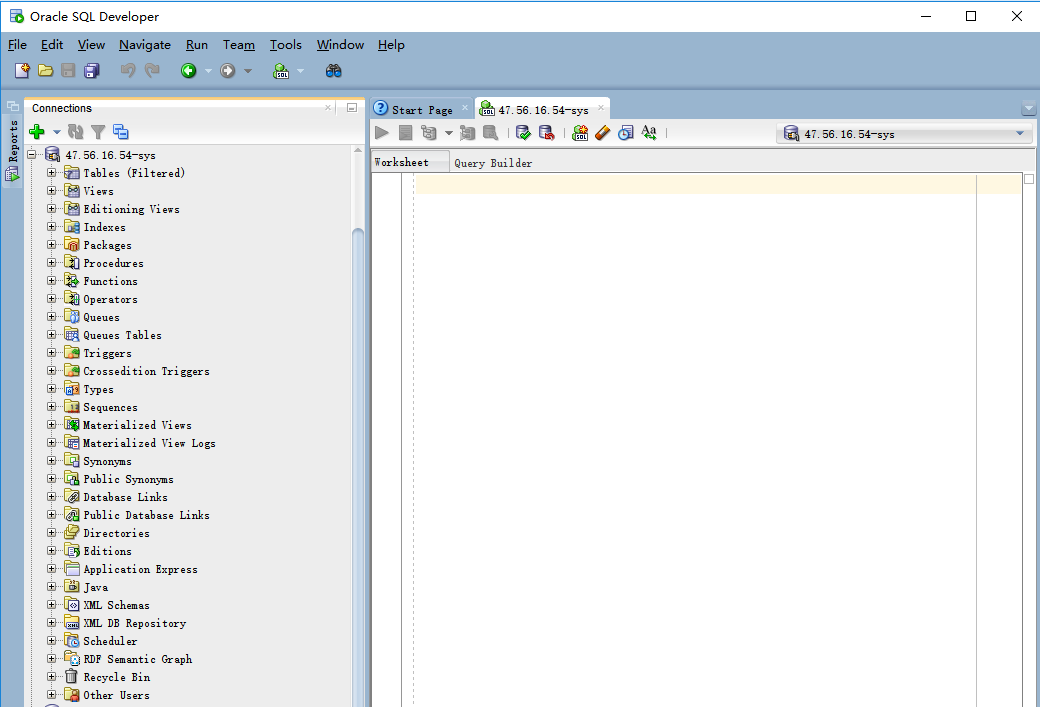
连接成功。
创建自启动脚本:
# vim /etc/init.d/oracle
内容如下:
#!/bin/sh
# chkconfig: 35 80 10
# description: Oracle auto start-stop script.

#
# Set ORA_HOME to be equivalent to the $ORACLE_HOME
# from which you wish to execute dbstart and dbshut;
#
# Set ORA_OWNER to the user id of the owner of the
# Oracle database in ORA_HOME.


ORA_HOME=/data/app/oracle/product/11.2.0/dbhome_1
ORA_OWNER=oracle
if [ ! -f $ORA_HOME/bin/dbstart ]
then
    echo "Oracle startup: cannot start"
    exit
fi

case "$1" in
'start')
        # Start the Oracle databases:
        echo "Starting Oracle Databases ... "
        echo "-------------------------------------------------" >> /var/log/oracle
        date +" %T %a %D : Starting Oracle Databases as part of system up." >> /var/log/oracle
        echo "-------------------------------------------------" >> /var/log/oracle
        su - $ORA_OWNER -c "$ORA_HOME/bin/dbstart" >>/var/log/oracle
        echo "Done"

        # Start the Listener:
        echo "Starting Oracle Listeners ... "
        echo "-------------------------------------------------" >> /var/log/oracle
        date +" %T %a %D : Starting Oracle Listeners as part of system up." >> /var/log/oracle
        echo "-------------------------------------------------" >> /var/log/oracle
        su - $ORA_OWNER -c "$ORA_HOME/bin/lsnrctl start" >>/var/log/oracle
        echo "Done."
        echo "-------------------------------------------------" >> /var/log/oracle
        date +" %T %a %D : Finished." >> /var/log/oracle
        echo "-------------------------------------------------" >> /var/log/oracle
        touch /var/lock/subsys/oracle
        ;;
'stop')
        # Stop the Oracle Listener:
        echo "Stoping Oracle Listeners ... "
        echo "-------------------------------------------------" >> /var/log/oracle
        date +" %T %a %D : Stoping Oracle Listener as part of system down." >> /var/log/oracle
        echo "-------------------------------------------------" >> /var/log/oracle
        su - $ORA_OWNER -c "$ORA_HOME/bin/lsnrctl stop" >>/var/log/oracle
        echo "Done."
        rm -f /var/lock/subsys/oracle

        # Stop the Oracle Database:
        echo "Stoping Oracle Databases ... "
        echo "-------------------------------------------------" >> /var/log/oracle
        date +" %T %a %D : Stoping Oracle Databases as part of system down." >> /var/log/oracle
        echo "-------------------------------------------------" >> /var/log/oracle
        su - $ORA_OWNER -c "$ORA_HOME/bin/dbshut" >>/var/log/oracle
        echo "Done."
        echo ""
        echo "-------------------------------------------------" >> /var/log/oracle
        date +" %T %a %D : Finished." >> /var/log/oracle
        echo "-------------------------------------------------" >> /var/log/oracle
        ;;

'restart')
        $0 stop
        $0 start
        ;;
esac
修改权限:
[root@iZj6cae5icqmf0twcxpyz5Z ~]# chmod +x /etc/init.d/oracle
加入开启启动:
[root@iZj6cae5icqmf0twcxpyz5Z ~]# echo '/etc/init.d/oracle start' >> /etc/rc.local
[root@iZj6cae5icqmf0twcxpyz5Z ~]# chmod +x /etc/rc.local
要使脚本在开机时能够生效,还需修改 /etc/oratab 文件,
将 chenxie:/data/app/oracle/product/11.2.0/dbhome_1:N
改为 chenxie:/data/app/oracle/product/11.2.0/dbhome_1:Y
完成。
Oracle 基本管理:
启动数据库:
# su - oracle
$ sqlplus / as sysdba
SQL> startup;
停止数据库:
# su - oracle
$ sqlplus / as sysdba
SQL > shutdown immediate;
启动监听:
# su - oracle
$ lsnrctl start
停止监听:
# su - oracle
$ lsnrctl stop
启动/停止EM:
[oracle@iZ2ze1uokpww52hrtbj6loZ ~]$ emctl start dbconsole
[oracle@iZ2ze1uokpww52hrtbj6loZ ~]$ emctl stop dbconsole
yef
写的太棒了,十分详细,感谢!